On this post we will install a headless Raspberry Pi OS Lite ARM64 image on a Raspberry Pi; that will serve as the base installation for future articles.
According to Wikipedia, a headless server is a computer system that has been configured to operate without a monitor, keyboard, and mouse. A headless system is typically controlled over a network connection.
Raspberry Pi OS (formerly Raspbian) is a Debian-based operating system for Raspberry Pi. The Lite version is a minimal operating system, without Graphical interfaces or Desktop Environment, perfect for our headless system.
And while the ARM64 is still a beta release (and therefore can't be found on the official download page or as an option on Raspberry Pi Imager), it's been fairly stable OS for me, but there are a few known issues listed on project's GitHub repository.
Prerequisites
- A Raspberry Pi 4 Model B
- A Micro SD Card (minimum of 8GB recommended)
You may need an adaptor for the Micro SD Card to USB.
Raspberry Pi Imager
Download and install the Raspberry Pi Imager utility. It's available on Windows, macOS and Ubuntu/Debian.
Raspberry Pi OS Lite ARM64
Download the latest image of Raspberry Pi OS Lite ARM64.
2021-05-07-raspios-buster-arm64-lite.zip was the latest at the time this post was published, check the repository for newer releases.
Flashing the Micro SD Card with the Raspberry Pi OS Lite ARM64 image
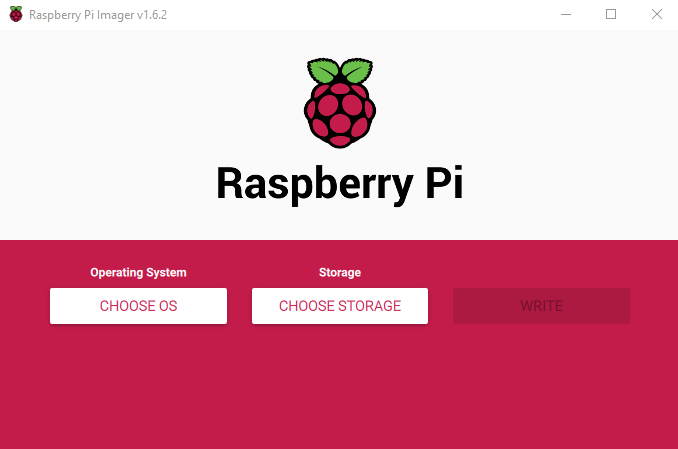
1. Open the Raspberry Pi Imager.
2. Under Operating System, click on CHOOSE OS.
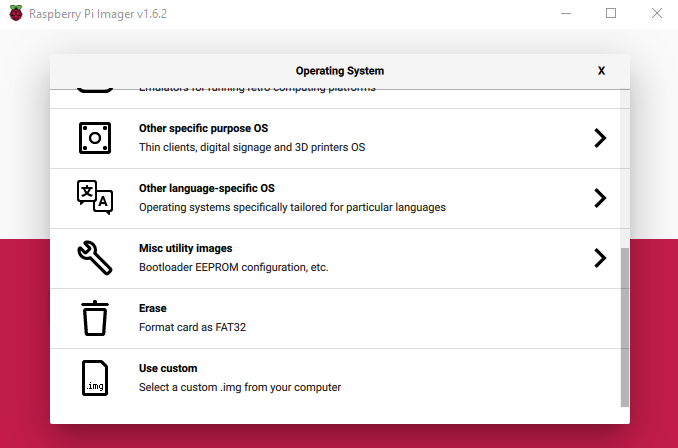
3. Scroll down on the list and select Use custom.
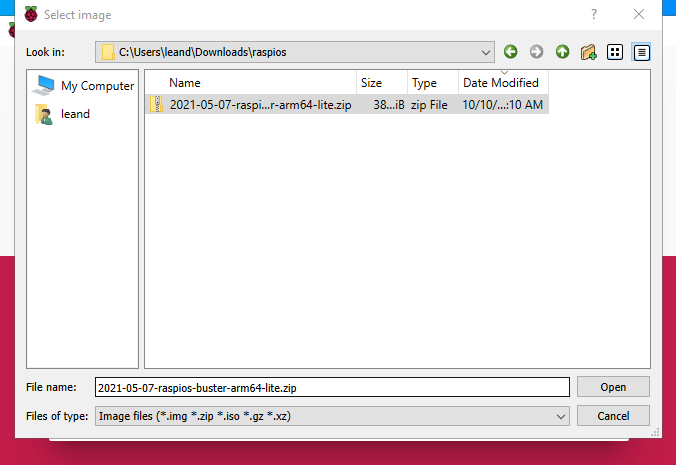
4. Select the 2021-05-07-raspios-buster-arm64-lite.zip (or newer) image.
5. Insert the Micro SD Card.
Ignore/cancel any messages to format the disk.
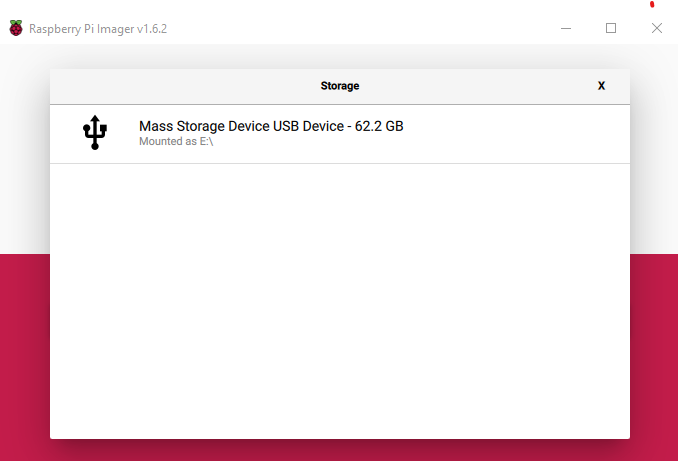
6. Under Storage, click on CHOOSE STORAGE.
7. Identify and select the Micro SD from the list.
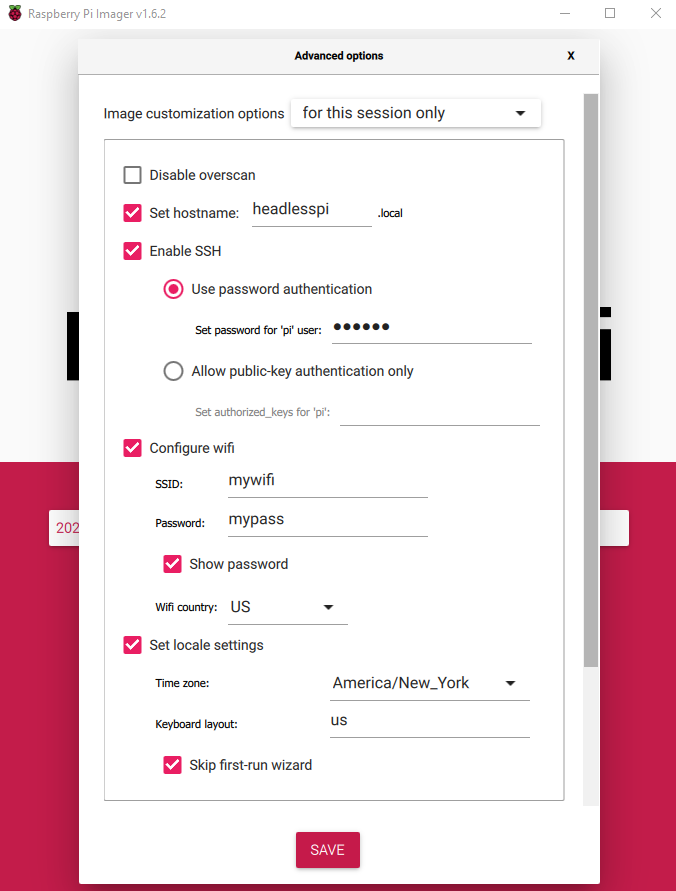
8. Press CTRL + ALT + X to open the Advanced options, this is how we will make the headless set up much easier:
- Check Set a hostname and define a hostname, especially if you already have a raspberrypi.local in your network.
- Check Enable SSH, Use password authentication and Set password for 'pi' user.
- Check Configure wifi (if you plan to use Wifi), with your network credentials, make sure to set Wifi country based on your region.
- Check Set locale settings, and select the Time zone and Keyboard layout.
- Check Skip first-run wizard, since we are basically configuring everything needed already.
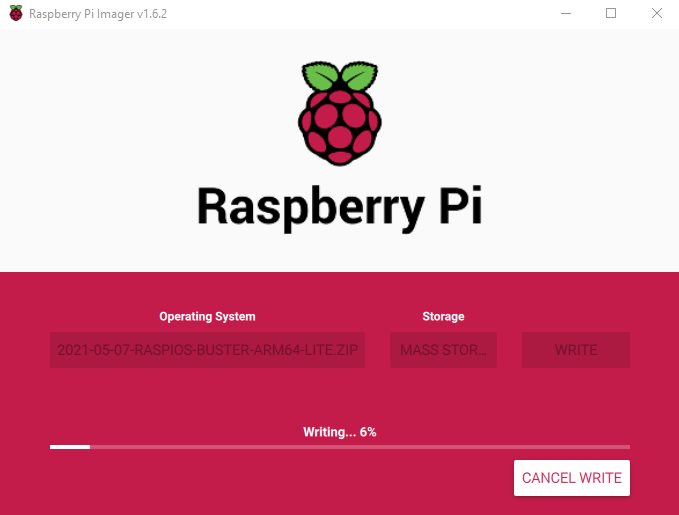
9. Finally, click on WRITE and confirm you want to continue to start flashing the Micro SD Card. This operation can take several minutes to complete.
Ignore/cancel any messages to format the disk that may pop up.
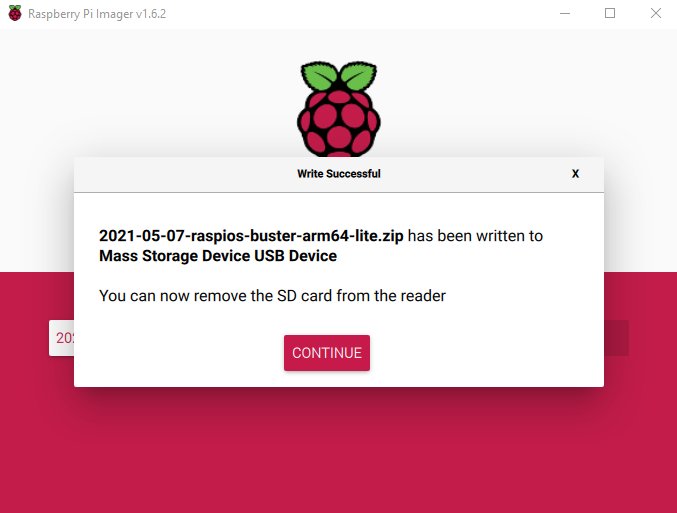
10. Once it's finished, remove the Micro SD Card from your computer and insert it on your Raspberry Pi. We are ready to boot our headless system next!
Booting the Raspberry Pi for the first time
Power up your newly installed Raspberry Pi and give it a couple minutes to boot up.
Then, assuming it was able to connected to the Wifi, we should able able to reach it from any computer in the same network.
1. Open a Terminal or Command Prompt and try to ping it:
The IP address shown may be different.
ping headlesspi.local
(out)Pinging headlesspi.local [192.168.1.4] with 32 bytes of data:
(out)Reply from 192.168.1.4: bytes=32 time=1ms TTL=63
(out)Reply from 192.168.1.4: bytes=32 time=2ms TTL=63
(out)Reply from 192.168.1.4: bytes=32 time=1ms TTL=63
(out)Reply from 192.168.1.4: bytes=32 time=1ms TTL=63
2. If ping works, let's try to log into it using SSH; if it asks if you want to continue, type yes and hit Enter:
ssh [email protected]
(out)The authenticity of host 'headlesspi.local (192.168.1.4)' can't be established.
(out)ECDSA key fingerprint is SHA256:Aq/cGckCEbnQT+r4VKehRi1Zlta4rNr4GjHKgmzp52Y.
(out)Are you sure you want to continue connecting (yes/no/[fingerprint])? yes
(out)[email protected]'s password:
3. Congrats! We are now on our headless Raspberry Pi. It's a good practice to update our system right away:
sudo apt update
sudo apt upgrade
sudo reboot